Overview
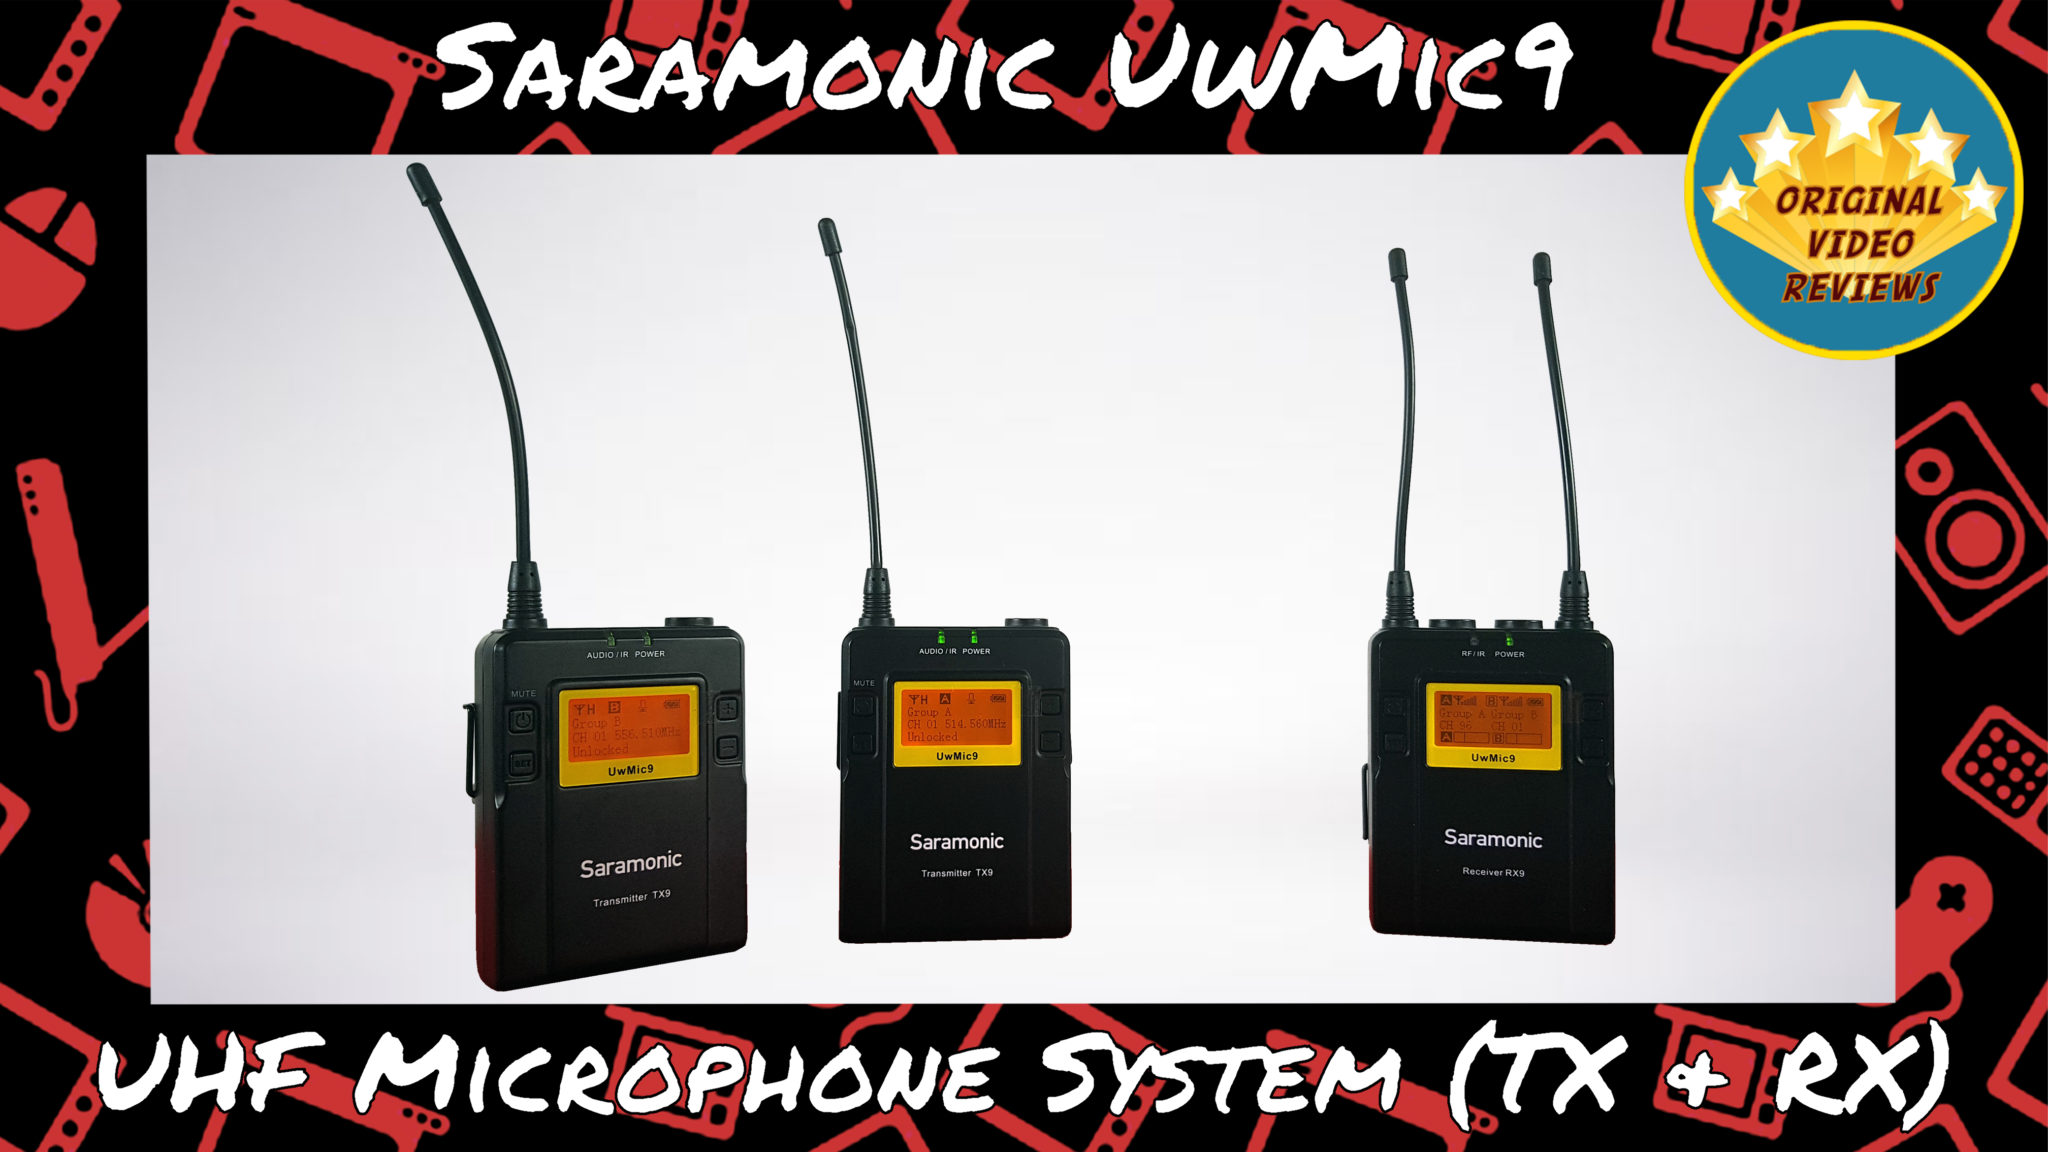
Are you looking for a wireless microphone that will fit an interview with more than 2 participants? then the Saramonic UwMic9 is probably a good option for this purpose. It is a camera-mountable wireless system that provides a relatively good sound for an affordable price.
This system fits DSLRs, Mirrorless, Pro Video and all types of cameras, audio recorders and mixers with 3.5mm or XLR microphone inputs. The two transmitters are great for capturing interviews.
In the video below, the OVR Guy introduces & explains how to use the Saramonic RX9 receiver.
Saramonic RX9 Wireless Receiver – Review & How To Use 📡🎤
Overview
Receiver: Saramonic UwMic9-RX9
The Saramonic RX9 is a camera-mountable integrated wireless receiver. It features a wide switching RF bandwidth, an easy-to-read LCD display, and infrared synchronization between transmitter and receiver.
Equipped with an auto-scan function, the RX9 can automatically search for an available transmission frequency.
The selectable output mode allows you to choose the output signal to be mono or stereo.
At the top of the receiver are the following:
Two antennas
A 3.5mm stereo phone jack to monitor the audio output
A 3.5mm output jack to connect the receiver to the camera
When plugging the cables into the jacks, make sure to secure the connection so the cables won’t disconnect during use.
At the front of the receiver are the following:
Power button
Power LED indicator – will show green or red, according to the battery’s level.
Set button – long press will enter/exit the displayed menu, short press will confirm the chosen option.
+/- buttons – navigation between menus and adjustments of the displayed values.
RF/IR indicator – displays the RF input level (green – RF signal is strong, red – RF signal is weak or disconnected).
LCD display – The display has a backlite orange light, that turns off after several moment, even if the receiver is on. It is very informative, and shows small yet clear symbols. Please see below the available menus.
On the right side of the receiver is the battery compartment. It is operated using two AA batteries.
At the back of the receiver is where the cold shoe mount can be attached using the metal belt clip that is supplied with the package. If it is placed properly, the receiver should be secured enough.
The receiver is made of metal, so it has some weight, especially with the batteries. When I placed the belt clip the coating got a scratch, so I recommend you to avoid removing the belt clips off the receiver & the transmitters unless you have a good reason to do that.
Available menus:
The reciver offers a total of 17 menus:
Home screen – The key is to understand what you see on this screen.
On the receiver’s display appear squares with the letters A & B. Each letter represents a group, i.e. one of the transmitters. When a square is dark, the group is turned on, and the receiver will receive audio from the transmitter. If the square is light the group is set to off, and the receiver won’t sound audio from the transmitter (even if the transmitter is turned on).
The two RF level indicators represent the receiver’s signal reception level for each group.
The battery level shows the status of the battery. If it flashes, you should replace both batteries. It is recommended to use rechargeable batteries of good quality.
Beneath each group is the current channel number that is associated with it.
At the bottom is the audio input level meter for each group.
Power Key – this will determine if the receiver’s power key is locked or not, to prevent the device from shutting off accidentally during use.
Output mode – choose between mono recording (the audio from left & right is mixed) and stereo recording (Group A represents right side & Group B represents left side).
Group A settings: Power – If a receiver is used, the group it represents should be “ON”, otherwise it should be set as “Off” to save battery.
Group A settings: Channel
Group A settings: Volume – The range can be set between 0-30.
Group A settings: Auto scan – Automatically scan for available & clear channels.
Group A settings: Match with TX – Match the receiver & transmitter via infrared.
Group B settings: Power
Group B settings: Channel
Group B settings: Volume
Group B settings: Auto scan
Group B settings: Match with TX
Backlite mode – set the background orange LED light in one of several options (constant on, completely off, shuts off after 10/30/60 seconds). This will affect the battery life.
Restore – restore the receiver to the factory default settings.
Version – displays the receiver’s version.
Serial – displays the receiver’s serial number.
Transmitter: Saramonic UwMic9-TX9
The Saramonic TX9 is a compact transmitter that employs a crystal-controlled PLL synthesizer. It is equipped with a mounting function and a BMP-type microphone input connector. The RF power output can be switched among high, middle, and low.
Specifications
Receiver: Saramonic UwMic9-RX9
| Channel number | 96 |
| Channel group | A and B |
| Oscillator type | PLL synthesizer |
| Audio output connector | 3.5 mm mini-jack |
| Receive frequencies | 514 MHz - 596 MHz |
| Receive sensitivity | -95 dBm |
| Signal to noise ratio | 70 dB or more |
| Reference deviation | +/- 5 kHz (-60 dBV, 1 kHz input) |
| Frequency response | 40 Hz to 18 kHz (+/- 3 dB) |
| Battery | Two AA-size batteries |
Transmitter: Saramonic UwMic9-TX9
| Channel number | 96 |
| Channel group | A or B |
| Oscillator type | PLL synthesizer |
| Carrier frequencies | 514 MHz - 596 MHz |
| Signal to noise ratio | 70 dB or more |
| Audio input connector | 3.5 mm mini-jack |
| Battery | Two AA-size batteries |
Inside the box
| Item | Qty |
|---|---|
| Portable receiver - Saramonic RX9 | 1 |
| Body-pack transmitter - Saramonic TX9 | 2 |
| Omni-directional lavalier microphone | 2 |
| XLR-BMP audio output cable | 1 |
| 3.5mm plug-BMP audio cable | 1 |
| Shoe mount adapter | 1 |
| Belt clip | 3 |
| Microphone holder clip | 2 |
| Wind protector | 2 |
| User manual | 1 |
| Warranty card | 1 |
Pros
I will update this info soon
Cons
I will update this info soon
Overall verdict
I will update this info soon
Where to buy
Below are links to purchase the Saramonic UwMic9 UHF microphone system (or similar models):
Photos
User manual
I will update this info soon
Additional links
I will update this info if relevant
FAQ
Q: Is this kit waterproof?
A: No, it isn’t recommended to expose this kit to water.
Q: How can I avoid acoustical feedback?
A: To avoid acoustical feedback, keep the microphone away from loudspeakers.
Q: Should I remove the batteries when the kit isn’t in use?
A: Yes, it is recommended to remove the batteries from the battery compartment if they won’t be in use for a long time.
Comments
Subscribe our channels
Choose the channels you like and subscribe on YouTube.
Follow us
Explore more content, updates and fun moments on social media.
Disclaimer
This post contains affiliate links. Please check out my disclosure policy for more details.
Thank you for your support & understanding!

